5.3 Common Oil Leaks (7 Locations)
Finding drops of oil underneath your vehicle can be worrying. If you own a car with a 5.3L V8 engine, those leaks may originate from some common sources. In this guide, we’ll explore the typical culprits behind oil leaks on these engines, empowering you with knowledge to address this frustrating issue.
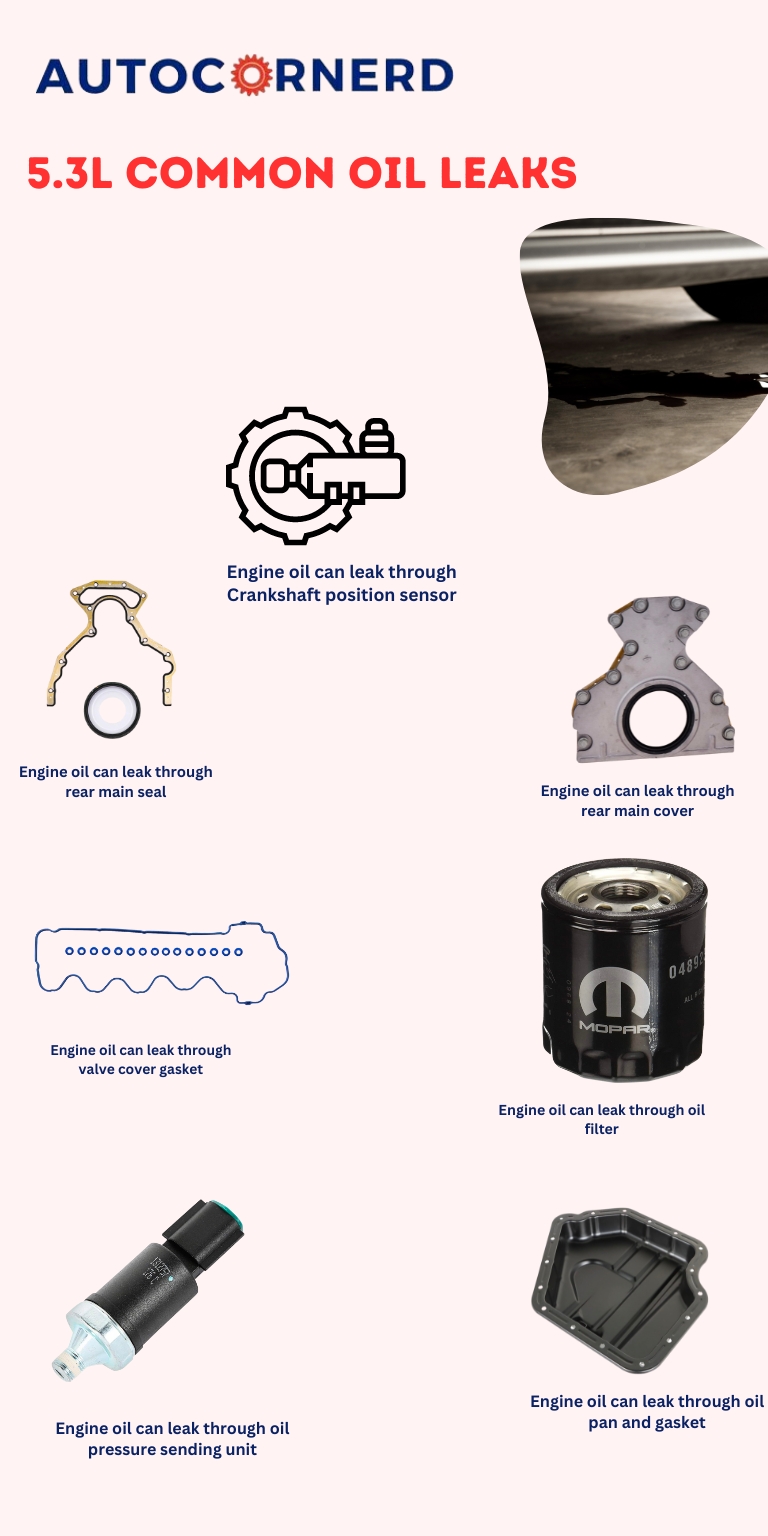
So, what are common oil leaks in 5.3L engine? On 5.3L engines, there are some places on which oil leaks occur. The most common locations include a degraded oil pan gasket, oil pressure sending unit, oil filter adapter, valve cover gasket, rear cover gasket, rear main seal, or flywheel area, and near the bolts of transmission bell housing area.
To identify oil leak spots in your 5.3L Chevy engine, you must clean it all up with an engine degreaser and check it a few times once it’s clean. This is because oil leaks can start higher up and dribble down, making it look like it is leaking from somewhere else.
The wind current from driving can also push oil far from its point of origin. So, after a thorough cleaning, you can spray talcum powder all over. The source will appear as a brown spot in the white talcum powder.
You can also add ultraviolet dye to the oil, run the engine with it and look for the leak with a UV light.
I found the below video really helped to spot the oil leaking areas using UV dye and talcum powder.
Bonus Read: Excessive oil consumption in Chevy Engines with AFM
5.3 Common Oil Leaks Causes
Here are the causes of oil leaks in Chevy 5.3 engines.
1. Lower Oil Pan Gasket or Oil Pan
Oil leak from the oil pan gasket is one of the most common spots on Chevy 5.3L engines. The oil pan is the part of the engine where all the oil is stored. It has an oil pan gasket to keep oil from seeping out of the oil pan. Over time, the gasket may become worn down and leak oil.
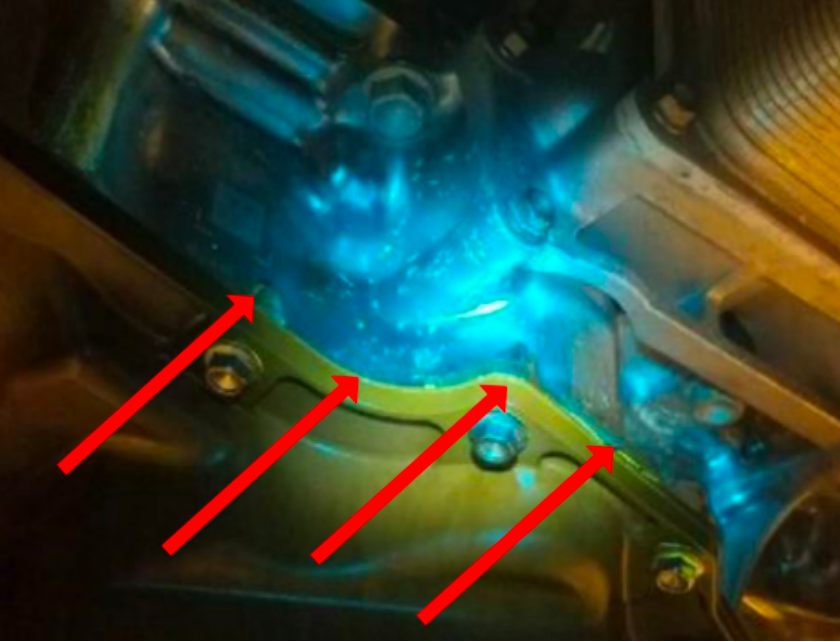
One person used trace powder and dye to detect the oil from the oil pan, and you can the traces from the oil pan surface.
Removing the oil pan is quite tricky and a time-consuming process. You need to perform the following steps:
- Remove the negative cable from the battery
- Remove the oil level indicator tube. This step is important as the tube goes through a hole in the oil pan gasket.
- Raise the vehicle.
- Remove the engine oil filter.
- Remove support rods one on each side of engine
- Remove the oil filter adapter.
- Remove the starter as the starter goes through a hole in the flywheel inspection cover.
- Remove the flywheel inspection cover to allow access to the oil pan bolts.
- You will also need to unbolt the lower differential bolt (on the driver’s side) and the 2 bolts on the passenger side. This will allow the differential to swing down while still attached to the axles. Then you have to unbolt the 2 engine mount bolts.
- Now put a 2×4 on the harmonic balancer and jack up the engine about 3-4″.
- Remove the oil pan nuts and bolts. Note the location of any studs to assist in reassembly.
- Remove the engine oil pan and the gasket.
You can also watch the youtube video below to remove the oil filter.
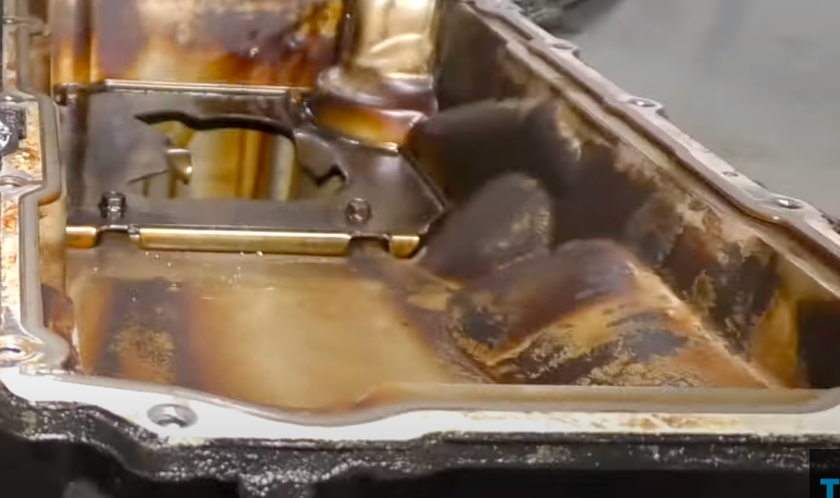
After removing the oil pan, you need to inspect its gasket, any cracks in the oil pan, and all the bolts on it. Also, make sure that the machined surface around the bolt hole in the oil pan is clean and that there are no imperfections. Lastly, make sure that the oil pan bolts are properly tightened with 50 degrees of rotation so that oil cannot leak through them.
Bonus Read: Oil leaks when car is parked
2. Oil Pressure Sending Unit
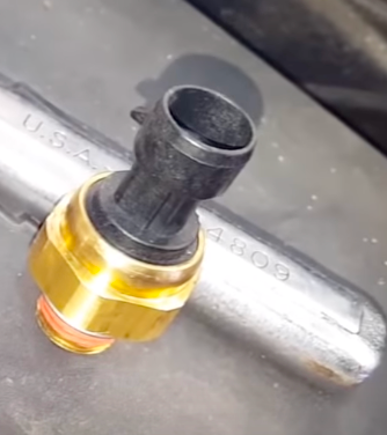
Oil leakage from the oil pressure sender is also a common oil leakage spot in 5.3L Chevy engines.
Oil pressure sender in an engine helps to maintain the proper oil pressure level. Oil pressure sender is an electrical switch that detects the oil pressure and sends an electrical signal to the engine control unit.
The engine control unit computes the electric signals and converts this back to a pressure reading which you can see on the instrument panel.
The oil pressure sensor is usually located on the right rear corner of the 5.3L engine block if you are looking from the front. You can only get one hand back there to remove the connector. You would need an oil pressure switch socket, 1 1/16″ deep socket w/swivel, 6″ extension bar, and 3/8″ ratcheting wrench.
The reason for which oil is leaking through the oil pressure sensor is that sensor is probably loose. The oil pressure sending unit base fitting is separate and threads directly into a threaded hole in the engine block. If the fitting is loose, the oil will leak through the oil pressure sending unit.
If you observe the oil leaking at the rear of the engine intake or oil dripping on the back of the bell housing, the chances are that oil is leaking from the oil pressure sending unit.
Since there is no way to look behind the intake manifold to inspect oil leakage around the oil pressure sending unit, you might have to use a borescope.
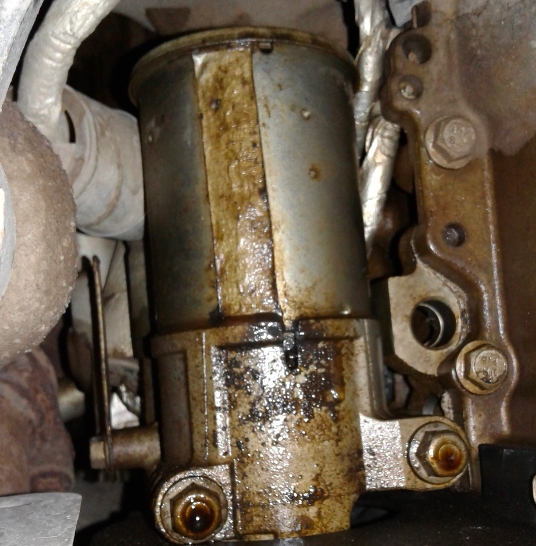
3. Bad Oil Filter and Oil Adapter
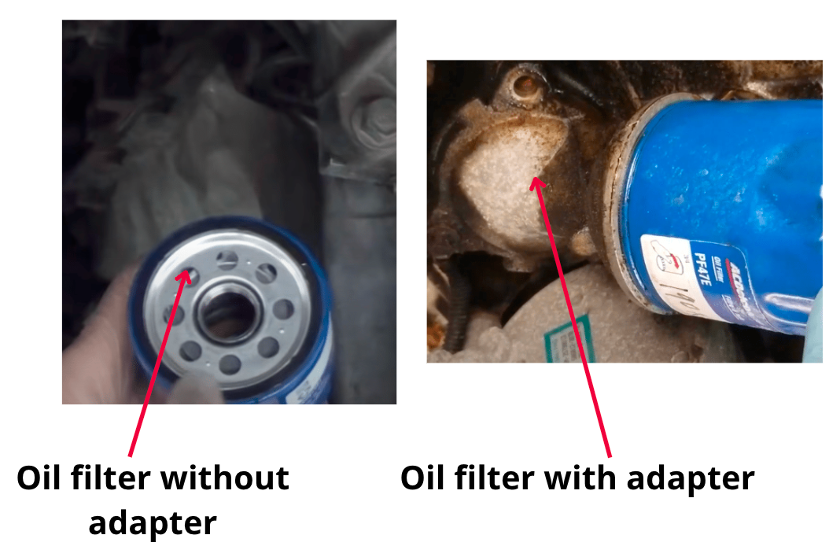
If the oil filter adapter is loose, oil can also leak through it in 5.3L Chevy engines. In engines, the oil filter is used to separate the debris from the oil. You can find it near the oil pan.
The oil filter is bolted to the engine block through an oil adapter. If you overtighten the oil filter, it will damage the gasket between the oil adapter and engine, and the oil filter gasket. Not all engines use an oil filter adapter. In some engines, the oil filter is fitted directly into the engine.
Moreover, the oil passes through the oil filter under a very high pressure generated by the oil pump.
If the oil filter is not properly tight, the oil will leak through it. Moreover, the bad seal of the oil filter can also cause oil leaks through the oil filter.
Always follow the torque recommendations of the manufacturer to tighten the oil filter and its adapter.
Furthermore, if you do not install the oil filter of the correct size, it will also cause oil leaks. You should consider installing the OEM oil filter.
Lastly, make sure that there is only one gasket on the oil filter. If you accidentally double-gasket an oil filter, it will blow out and excessive oil will start leaking through it. Moreover, smear a light layer of oil around the oil filter gasket so it doesn’t bind on installation.
You can check out the below video from 5:00 time. That guy has explained in detail about the leakages through the oil filter.
Usually, the oil filter is hand-tighten, but in some vehicles with a 5.3L engine, you can’t easily reach your hands to fit or loosen the oil filter. In that case, you will have to use the clamp-type tool to tighten the oil filter as this guy is using in the video below (watch from 2:00):
4. Valve Cover Gasket
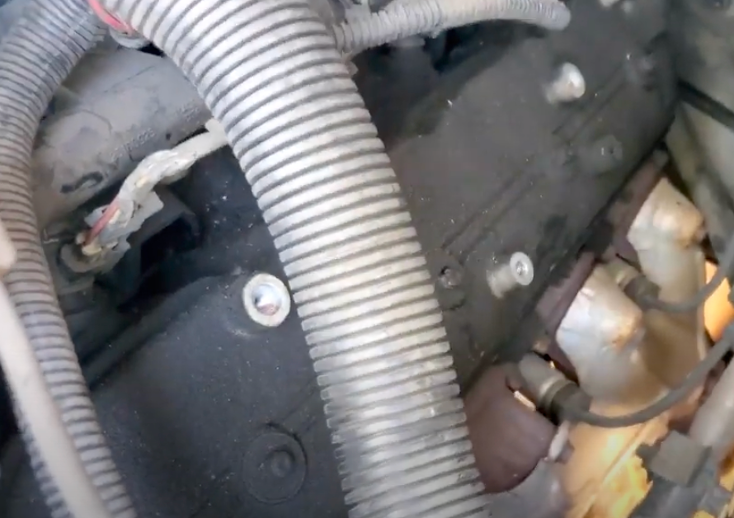
The valve cover is also called rocker cover. It is placed on the cylinder header to cover the rocker arm and push rods in 5.3L Chevy engines. There is a gasket between the valve cover and the cylinder head to prevent oil leakage. If you can see the oil around the seam of the valve cover, it means that you should replace the valve cover gasket.
You can watch out the below video for valve cover gasket removal:
5. Rear Cover Assembly Area
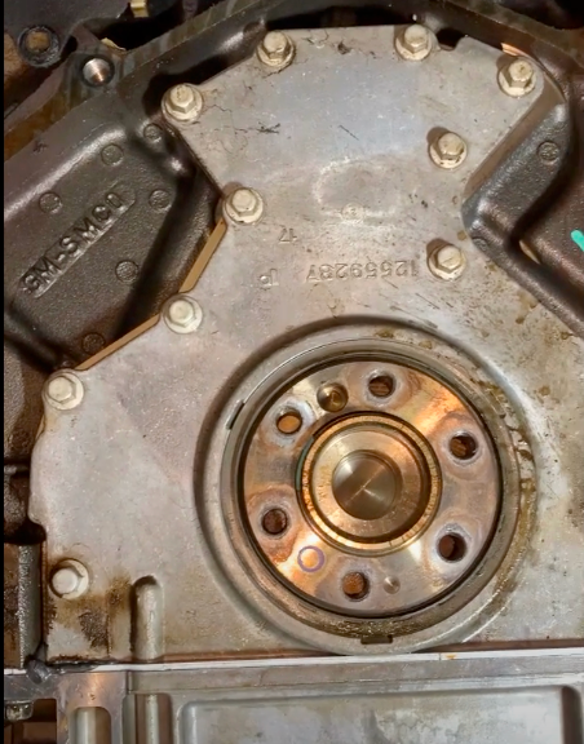
Regarding the oil leakage from the rear cover in Chevy 5.3L engines, GM has also issued a bulletin to aware the people. Rear cover of the engine is located on the side where the flywheel is mounted.
If the leak has been diagnosed as coming from the engine rear cover assembly, you will have to remove the rear cover assembly. According to General Motors, this oil leak from the rear cover can result from engine block porosity on the sealing surface. Also, keep in mind that this bulletin by GM is only applied to the aluminum engine blocks.
To remove the rear cover of the engine, you will have to raise your vehicle using a hydraulic jack. The rear cover plate requires the transmission be moved way back or removed. The flywheel also needs to be removed.
Check if you find any porosity on the rear cover. The porosity issue on the rear cover of the engine is in the gasket sealing surface at the top of the cover, near the high-pressure oil crossover port. If this is the case, you have to replace the engine rear cover with GM P/N 12633579.

If the porosity is found on the mating surface of the engine block, you will have to apply a small amount of RTV (Engine Sealent) using a plastic scraper to repair the engine block porosity.
6. Damaged Rear Main Seal
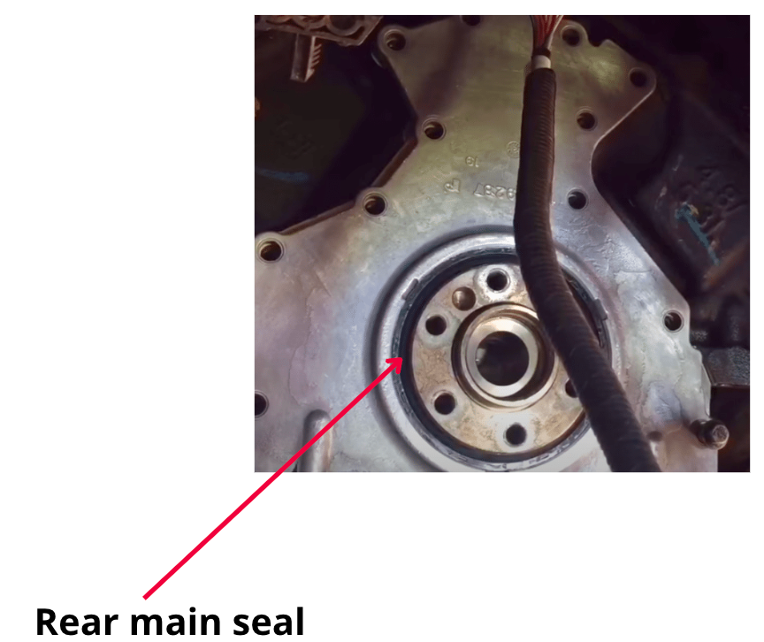
The rear main seal of the engine seals the oil where the crankshaft ends and is connected with a flywheel. In the above step of rear cover inspection, you should also check the rear main seal if you see oil leaking over the flywheel. Another symptom of the damaged rear main seal is that you may see oil seepage on the bell housing of the transmission system.
7. Leaking Crankshaft Position Sensor
If you see oil dripping around the starter bolts, the chances are that the crankshaft position sensor is leaking as it sits above the starter.
The O-rings of the crankshaft position sensor are notorious for deforming and causing leakage. GM has no specific part number for the O-ring. So, you will have to completely replace the crankshaft position sensor. Please don’t go for cheap aftermarket crank sensors. You can buy GM/AC Delco crank sensor here.
Why Does My 5.3 Burn Oil?
The 5.3L V8 engine by General Motors (GM) has been known to burn excessive oil in certain model years. The main culprits are 2007-2011 trucks with Active Fuel Management (AFM).
AFM allows cylinders to deactivate to improve fuel economy. However, this can cause oil leaks past the AFM valvetrain into combustion chambers.
Causes of excessive oil burning in those 5.3L engines include leaking AFM valves, clogged PCV systems, worn piston rings, and faulty valve covers. Oil leaks past worn seals into cylinders then gets burned off. This causes accelerated wear, oil fouling spark plugs, and excess emissions.
GM has issued technical service bulletins and redesigned parts to address root causes.
GM says that burning up to 2.5 quarts between changes is considered “normal”, and advises check PCV and valve covers if oil burns more than that.
The most problematic engines were installed in 2007-2011 GM trucks before design changes.
Worn piston rings allow oil past the cylinder into the combustion chamber. Rings get gummed up with carbon deposits from blow-by gases. This tends to happen around 40k-50k miles.
Other factors like extended oil change intervals, thick oil, and cold weather can worsen consumption. Burn rates of 1-2 quarts per 1,000 miles are common.
Fixes include updating to redesigned valve covers and oil pans, disabling AFM, cleaning carbon deposits, replacing piston rings/valve seals, or rebuilding engines.
GM approved repairs under warranty in some cases after oil consumption tests. Higher mileage engines often need complete rebuilds.
GM’s fixes include improved valve covers starting in 2011 trucks, along with updated oil pan shields to block AFM leaks.
Owners report replacing valve covers and installing oil deflector shield under oil pan reduces oil burning. AFM can also be disabled via engine computer tuning. This stops oil leaks into cylinders but doesn’t address worn internal seals/rings.
Final Thoughts
So, this was all about the most important areas where 5.3 common oil leaks take place. You should first check the oil pressure sender, crankshaft o-ring, oil filter, and oil pan for the oil leaks in your Chevy 5.3L engine. After then, look for other complicated areas like the rear cover and valve cover.
